• Home
    • Art Credits
    • Contact
  • Professional Dossier
  • Art Portfolio sample 2017
    • Gallery-full portfolio
  • Art Education Philosophies
    • Instruction and Management Plan
    • The Story of Why Art Ed
    • Career Timeline
  • Blog
    • What is that? Art and Discovery
  • Pre-Service Teaching Experience
    • Introduction to Education
    • Educational Technology
    • Educational strategies study
    • Middle school practicum
    • High school Practicum experience >
      • 450 Setting and Context
      • Standard 1
      • Standard 2
      • Standard 3
      • Standard 4
      • Standard 5
      • 450 Formal Lessons
      • Sample works 450 FCHS
      • Conclusion
    • Exceptional Art >
      • Exceptional Art Setting and Context >
        • Community Connections Blog
        • Journal Entries for Service learning
        • Synthesis and Conclusion
    • Polaris Teaching Experience >
      • Polaris Expeditionary Lab 2016 >
        • Presentation of learning 466
        • Unit and Lesson Standards
        • Unit Topic and Rationale
        • Instruction, Assessment and Management
        • Pecha Kucha
  • South Africa Teaching Experience
  • Student Teaching
    • Elementary >
      • Unit Topic and Rationale
      • Unit Standards, Goals and Objectives
      • Assessment tools and Data- Elementary
      • Kindergarten, 1st, 2nd >
        • Collagraph Printmaking
        • Critter Haven
      • 4th Grade >
        • Architecture: Mobility
    • Secondary >
      • Unit Topic and Rationale
      • Unit Standards, Goals and Objectives
      • Assessment Tools (Pre, Post and instructional)
      • Assessment Data and Analysis
      • 2D Design >
        • Line!
        • Shape!
      • Painting I >
        • Color Theory lesson
      • Drawing I >
        • Value
        • Observation
    • Student Teaching Experience Reflection
  • Tinkermill Community Education
Crystal Hinds
UNDER CONSTRUCTION AND UPDATES FOR 2021

Day Five 4-18-2016: Collaboration and Community

5/11/2016

0 Comments

 
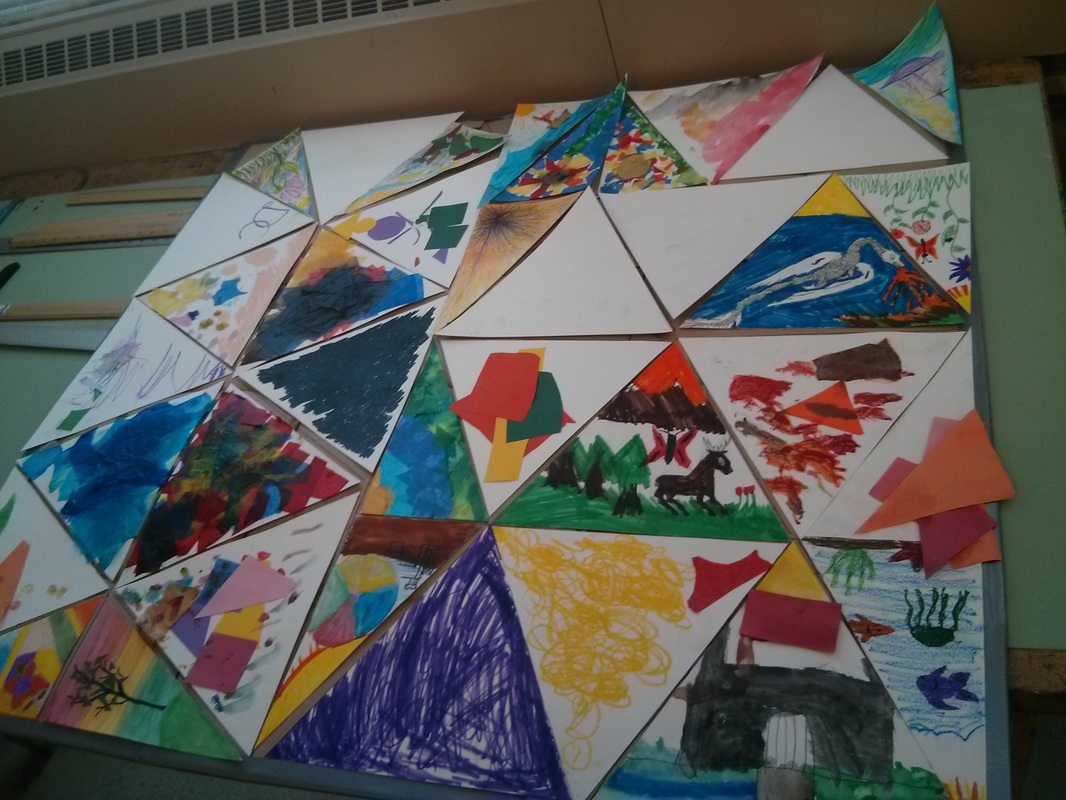
Our final project and lesson with these students. In this lesson we chose to teach about community projects, and how artists can work together to make larger pieces of work. We encouraged each student to create art around their favorite things. You can read more about this experience in our blog.

Picture
Service Learning Lesson Plan 5
Title: Collaboration and Community
Group/Date: 04/18
Community Connections Kellyn, Erica and Crystal


____________________________________________________________
Lesson Idea and Relevance: What are you going to teach and why is this lesson of importance to your students? How is it relevant to students of this age and background?
_____________________________________________________________


  • Teachers will use a completing a group puzzle to teach about the concept of unity.
    • This lesson will help foster reasoning related to geometric shapes as well as allow students to contribute to a group project and collaborate with their classmates.

______________________________________________________________
______________________________________________________________
Essential Understanding (s): What are the “big ideas”? What specific understandings about them are desired?
______________________________________________________________
  • Artists can work collaboratively with other artists to make large pieces of community driven work.
_______________________________________________________
_______________________________________________________

Essential Question (s): What provocative questions will foster inquiry, understanding, and transfer of learning?
_______________________________________________________
  • How do artists use pieces of a whole or individual geometric shapes to create artwork?
  • How can artists work with other artists to create artwork that is unified?

______________________________________________________________
______________________________________________________________Outcomes - Students will be able to...What key knowledge and skills will students acquire as a result of this unit? ...Art history and culture; expressive features and characteristics of art; art materials, tools, and techniques? What should they eventually be able to do as a result of such knowledge and skill?  ...Compare and contrast art work; analyze sketches?
Students will be able to:
_______________________________________________________


  1. Students will be able to demonstrate geometric reasoning through placement of their puzzle piece in the puzzle frame.
  2. Students will problem solve​to complete a whole work of art.
  3. Students will compare and contrast how the individual pieces make up the whole work,they will analyze the aesthetic effect of the whole for the best fit of the individual components.

  4. Students will create "an art component" using known and unknown materials, color, and shape to express content.


______________________________________________________________
______________________________________________________________

Student Reflective Activity: Through what authentic performance task(s) will students demonstrate the desired understandings? How will students reflect upon and self-assess their learning?
______________________________________________________________


  1. Students will reflect on their work in progress through personal and external inquiry.
  2. Students will engage in a gallery walk to view and respond to the finished collaborative piece.


______________________________________________________________
______________________________________________________________

Assessment Instrument (s): By what criteria will “performances of understanding” be judged?
______________________________________________________________
  • Students will demonstrate through collaboration with their peers, and creation of parts of a whole; the meaning of community.

  • Students will demonstrate critical thinking through placement of their piece of the puzzle to complete the whole.

Rubric:
Good:
Getting it:
Not Getting it:
______________________________________________________________
______________________________________________________________

Pre-assessment: How will you help the students know where the unit is going and what is expected? Help the teacher know where the students are coming from (prior knowledge, interests)?
______________________________________________________________
  • Teachers will inquire about prior knowledge and familiarity with local/public/collaborative art.
    • “What is teamwork?”
    • “How can artists use teamwork to make unified art?”
    • “Are you familiar with public art?"
    • "What about community driven art projects?”

______________________________________________________________
______________________________________________________________
Motivation: How will you hook all students and hold their interest?
______________________________________________________________
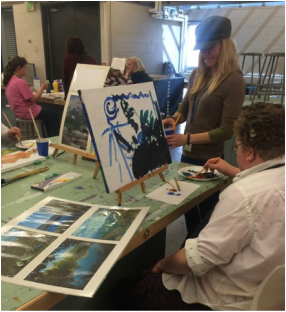
  • Teachers will share example works of community projects to students to connect personal experiences.
  • Teachers will ask questions like, “Have you seen a large scale artwork in your community?” “How many people do you think worked on it?” “Have you ever worked with other people to create a work of art?”
  • Teachers will also get an idea about students’ knowledge of geometric reasoning by asking questions like,“Who here has ever put a puzzle together?” Or, if I turn this puzzle piece like this, will it fit together with the other pieces?”
  • Teachers will gauge reactions of recognition of students and their personal experiences shared with class.

______________________________________________________________
______________________________________________________________

Ideation: How will you equip students, help them experience the key ideas, and explore the issues to generate ideas for their art work?
______________________________________________________________
  • The lesson will focus on the students’ own personal interests along with community collaboration. Students will be shown examples of the end result to give them an idea of the goal: Collaborative and unified art.
  • “We have looked at some community projects created by X, Y, and Z communities what images does it bring to mind for your own project?”
  • “What does community mean to you?”
  • Some artists use color to convey
    emotion, what emotions do you experience when you think of your community? What colors would you use to show that?

______________________________________________________________
______________________________________________________________
Procedures: How is the lesson organized to maximize initial and sustained engagement as well as effective learning? Provide opportunities to rethink and revise their understandings and work? Allow students to evaluate their work and its implications? Include literacy and numeracy?
______________________________________________________________
  1. Welcome students back to class. Offer name tags if they wish to create them.
  2. Crystal will Briefly review what we did last class and compare to today’s lesson
  3. Kellyn will show an example of a collaborative piece, and make the connection between the art and community. These artists are individuals working together to create a diverse work that represents the community.

  4. Ex:“T​hisartworkbycreatedbyArtistFranciscoAlvarado­Juárezandfivelocalorganizations
    (shown at the H​amilton building: Denver Art Museum) joined 5 dynamically shaped panels to create a cohesive piece. Each panel has a unique representation about the environment.
    1. Can ask things like, “what kinds of different things can you see in this piece of art? Do each of the pieces look different or the same to you? Is this one piece of art or is it more than one pieces of art?” And then can say something like, “each panel is different because a different organization created each one. Yet they put all of the pieces together to create one piece of art.”
    2. Ex: F​ort Collins Mural Project artwork brings art to public spaces. Can ask things like, “What do you think the goal of the project is?” (One goal is to beautify the city and enrich the culture and community.)
    3. Erica and Crystal will help to hold up examples and bring them closer to the groups so that they can directly engage with them.
  5. Erica will review the materials that we have used so far and any new materials briefly, Kellyn and Crystal will assist.
    1. We will briefly demonstrate watercolor use and compare the similarities and differences to acrylic painting.
    2. Pass around sample sheets of the difference between marker, colored pencil, pastels, crayons and watercolor pencils. (Review.)
  6. Crystal will introduce the lesson. Kellyn and Erica will pass out materials and get students prepared to participate

   8.  Clean up will take place before the gallery walk. Clean up will happen minutes prior to end of class to allow plenty of time for gallery walk and brief closing conversations. Also, all previous art work must be made available for students to claim.

Approximate timeline for class period:

12:30­12:35 greeting and seating
12:36­ 12:40 assignment introduction
12:41­1:30 work on triangles
1:31­1:40 clean up spaces and materials
1:41­1:59 triangle placement and gallery walk, photos.
2:00 dismissal


Questions to consider during class:

Who is in your community? (personal relationships)
What kinds of things would you find in your community? (Place and identity)
What types of activities do you do in your community? (action and development)
Where could you help people in your community? (contribution and collaboration)
How does that color communicate your intent? (communication)
Additional Notes:
a. Community project: Class puzzle. Today we are going to create a collaborative puzzle. One idea of community is that every individual has something to contribute to a larger group of people with similar interests or needs. We would like for you to translate your idea of community into a visual representation. Think of how the people in your life that help you, or you help affect your daily lives and how that makes you feel. The way it works is everyone does their own work on each of these triangles, when you are finished we fit all of your individual pieces together to create a whole work of art. Just like a community we each have our own vision to contribute and when we work together we


create something wholly diverse and inclusive. We are also creating something that has unity. You may choose what materials you would like to use on your triangle. We ask that you consider your composition and try to use the entire space. We have enough triangles for everyone to do at least two. When you are finished, we would like you to find a spot in the puzzle to place your piece where it fits.
b. There will be a large layout of the puzzle so that students can figure out how to rotate or move their piece to make it fit.
Around 1:30 we will have students who are still working, make finishing marks and bring their triangle(s) to the puzzle frame for placement. Students may work with paras or teachers for placement of triangle if necessary.
Once every triangle has been placed the students will view and comment where possible. Photos will be taken of whole group and the completed puzzle.
The lesson will be concluded at this point and students will be dismissed.

______________________________________________________________
______________________________________________________________

Materials and Resources: What is needed to complete the learning plan? List materials and resources in a bullet-ed format.
______________________________________________________________
  • Large piece of cardboard
  • Scissors
  • White paper
  •  Markers
  •  Paint
  •  Paintbrushes
  •  Watercolor paints
  •  Tissue paper
  •  Watered­down glue
  •  Oil pastels
  •  Pre­cut Triangles
  • Pencils and erasers

______________________________________________________________
______________________________________________________________

Preparation and Safety: What do you need to prepare for this experience? What safety issues need to be addressed? List steps of preparation and safety in a bullet-ed format.
______________________________________________________________
  • Assemble materials
  •   Monitor safe usage of tools

  •   Assemble puzzle backing and mark outlines

  •   Prep for any accommodations

______________________________________________________________
______________________________________________________________

Accommodations: How is the lesson tailored (personalized) to the different needs, interests, and abilities of learners? ...Access (Resources and/or Process) and Expression (Products and/or Performance)?
______________________________________________________________

1. Elli needs to be able to sit in a chair instead of a stool if she needs. She will have a table set up next to the art tables.
2. Shelby will be monitored for continued interest. She has a short attention span.
3. All non verbal communicators will be shown the techniques through hand-over-hand demonstration.
4. Employ certain participants to assist in demonstrations, through their own activity.
______________________________________________________________
______________________________________________________________
             __________________________________________


0 Comments

Day Four 4/4/2016: Painting 

5/11/2016

0 Comments

 
For this lesson we focused on a few principles of art, particularly line, shape and color. The desired understanding was that these elements are basic tools that an artist would use in the art making process. You can view the blog post and the rest of the experience here.
Picture
Service Learning Lesson Plan 4
Title: Painting
Group/Date: 04/04/2016
Community Connections Kellyn, Erica and Crystal


____________________________________________________________
Lesson Idea and Relevance: What are you going to teach and why is this lesson of importance to your students? How is it relevant to students of this age and background?
_____________________________________________________________


  • Teachers will use landscape paintings to teach students about line, shape, and color, and creating a finished work of art.
    • These elements are basic tools to help students create pieces of art and understand the art­-making process as it relates to effective design.

______________________________________________________________
______________________________________________________________
Essential Understanding (s): What are the “big ideas”? What specific understandings about them are desired?
______________________________________________________________
  • Artists utilize the formal elements for the creative process.

_______________________________________________________
_______________________________________________________

Essential Question (s): What provocative questions will foster inquiry, understanding, and transfer of learning?
_______________________________________________________
  • What does an artist consider when they make art?
  • Are there certain elements that make some art more pleasing to view than others?


______________________________________________________________
______________________________________________________________
Outcomes - Students will be able to...What key knowledge and skills will students acquire as a result of this unit? ...Art history and culture; expressive features and characteristics of art; art materials, tools, and techniques? What should they eventually be able to do as a result of such knowledge and skill?  ...Compare and contrast art work; analyze sketches?
Students will be able to:
_______________________________________________________


  •  Students will be able to transfer their understanding of at least two of the formal elements of line, shape and color into their process of creating a landscape painting.
  • Students will be able to identify lines in their landscape by drawing their landscape in the form of lines.

  • Students will be able to identify the shapes they see in their landscape by drawing their landscape in the form of basic shapes.

  • Students will be able to identify color in their landscape by drawing their landscape with markers or painting their landscape with a wide variety of colors.

  • Students will be able to reference at least two formal elements in visual examples of landscape paintings.

  • Students will be able to inform the work of others through a gallery walk.

______________________________________________________________
______________________________________________________________

Student Reflective Activity: Through what authentic performance task(s) will students demonstrate the desired understandings? How will students reflect upon and self-assess their learning?
______________________________________________________________

  1. Students will reflect upon their work and the work of their peers through a gallery walk.
  • Students will be asked about specific paintings “_____, What formal element did use to create this object?”
  • “Tell me about what elements you used to depict the foreground .”
  • “____, can you show me where you see texture in _____’s painting?”
  • “Tell me about this..”
  • “How do you feel about this?”
  2.  Students will have opportunities to consider their process throughout
  the  class period. Teachers will prompt thought through questions, or            comments like:

  • “I see that when you paint this color, ______ happens/ changes!”
  • Or ask verbally responsive students questions like, “What is happening to the landscape as you make this line?”
  • Or, “Your use of space is interesting, what is happening in the foreground, middle ground, back ground?”
  • “Could you tell me more about this texture you made?”

______________________________________________________________
______________________________________________________________

Assessment Instrument (s): By what criteria will “performances of understanding” be judged?
______________________________________________________________


  1. Students will be able to paint different shapes that are appropriate for the objects they represent (shape)
  2. Students will separate the foreground of their painting from the background of their paintings as well as create landscape features using line. (line)
  3. Students will utilize and manipulate tools (like paintbrushes) in ways that are appropriate for the texture and patterns they are trying to create (texture and pattern)
  4. Teachers will comment with things like, “This piece makes me feel warm and fuzzy” or “I like how you made the mountains very dark and purple because they feel very powerful” to reflect students’ use of color in their pieces.
Rubric:​
Good:​Students will meet this criteria by completing all three examples of work exhibiting understanding at least two of the principles of line, shape and color.
OK:​Students will meet this criteria by completing paintings that show some understanding of at least two of line, shape and color.

Not Gettting it
:​Students will not complete any of the stages of the painting and will not demonstrate understanding of any of the formal elements.

_____________________________________________________________

______________________________________________________________
Pre-assessment: How will you help the students know where the unit is going and what is expected? Help the teacher know where the students are coming from (prior knowledge, interests)?
______________________________________________________________

  1. Teachers will revisit form and function from previous lessons as a way to see which students remember form. Can ask questions like, “Raise your hand if you remember how we made 3D forms?”
  2. Teachers can then say, “There are other elements of art to learn as well. Does anyone know ano of the elements of art?”
  3. Teachers can write line and value on the board so that the students know where the lesson is going.
  4. Teachers will then tell students that we are going to paint landscapes to learn about line, color, and finishing a complete work of art.

______________________________________________________________
______________________________________________________________
Motivation: How will you hook all students and hold their interest?
______________________________________________________________

  • The hook for today’s lesson will be a small introductory skit initiated during Erica’s introduction of the assignment.

______________________________________________________________
______________________________________________________________

Ideation: How will you equip students, help them experience the key ideas, and explore the issues to generate ideas for their art work?
______________________________________________________________
  • Teachers will engage the students through examples and demonstration of landscape painting. Students will be encouraged to explore their landscapes through line and texture, value and color.
___________________________________________________________
______________________________________________________________
Procedures: How is the lesson organized to maximize initial and sustained engagement as well as effective learning? Provide opportunities to rethink and revise their understandings and work? Allow students to evaluate their work and its implications? Include literacy and numeracy?
______________________________________________________________

  1. Welcome students back to class. Offer name tags if they wish to create them.
  2. Kellyn will Briefly review what we did last class and compare to today’s lesson (3D forms with clay to 2D painting of landscapes with the focus on the formal elements of design.) Crystal and Erica will show some of the pieces that we did last time while Kellyn is talking.

  3. Erica will ask Crystal and Kellyn which of the photos she is holding up is a landscape. One of them will answer incorrectly and then Erica will explain what makes the correct photos a landscape.
  4. Crystal will show the class some landscape pictures that will be posted on the board. There will also be copies of a landscape printed out at their tables for them to look at. “What do you see in this picture? Please tell me what kind of painting you believe this is.” “How do you think the artist created this painting?” Kellyn and Erica will assist at the tables to keep attention focused and listening.
  5. Ask students, “Where might we start in a landscape painting?”
  6. Erica will Introduce materials and lesson, Kellyn and Crystal will hand out materials. First project will involve a drawing with pencil and paper. The focus will be drawing the lines seen in the photo.

    1. How do we make line happen in a painting?
    2. “Most artists employ a rule of thirds, what this means is there is a
      foreground middle ground and background.” This can be used to denote space and depth in your painting. Demonstrate a picture that utilizes the rule of thirds to demonstrate Foreground, Middleground and Background.
  7. Erica, Kellyn and Crystal will have chosen a table to work with the participants at each.
    1. Each will make sure that each table is completely ready to work, the teachers will demonstrate while talking at each table allowing each student to see what they are doing to encourage work to begin.
    2. Students may either trace the lines over the photo or draw the lines themselves.
    3. Students can be shown the ‘block and draw’ method to reproduce a photographed landscape.

10. Teachers will conclude the lesson with a gallery walk and those who are able may discuss their work with others.
11. Clean up will take place before the gallery walk. Clean up will happen 20 minutes prior to end of class to allow plenty of time for gallery walk and brief closing conversations. Also, all previous art work must be made available for students to claim.

Approximate timeline for class period:
12:30­12:35 greeting
12:35­ 12:40 assignment introduction
12:40­1:00 first project
1:10­1:20 second project
1:20­1:40 third project
1:40­1:55 clean up
1:55­2:00 gallery walk and gather work for taking home.
2:00 dismissal


Questions to consider during class:
2. What is a landscape? What do you see in a landscape?
How could artists use the formal elements in a landscape?
How could artists use various materials to utilize the formal elements?
i. Block and draw is when you use a piece of paper to temporarily block all but a small portion of the picture, draw faint lines to denote foreground, middle ground and background and then use the paper to only show those portions one at time.
d. Assessing by individual students’ progress when to move to the next portion of the assignment.
Additional Notes:
Second portion of the assignment is to create the same landscape in color with markers or pastels on a slightly bigger sheet of paper. Questions should be posed to rekindle student’s interest in the project. “How does making this landscape in color change the way it looks?” “How does it affect the mood of your work?” Sometimes artists choose particular colors to represent emotions, even for such everyday scenes as a landscape.


Third portion of the assignment will be to move to canvas and offer paint for the student’s use. (If some students would be interested in creating the landscape using other materials, they will be offered markers and pastels.) How will it change the feel of your painting? Will you reconsider your previous composition in light of the new medium you get to use?
If students finish early or lose interest in the assignment, they can have the option of painting their sculptures from last time or temporary art activities. They will also have the option to paint another landscape or work with other materials such as building blocks.

______________________________________________________________
______________________________________________________________

Materials and Resources: What is needed to complete the learning plan? List materials and resources in a bullet-ed format.
______________________________________________________________

  •  Painting paper
  • Canvases (11)
  • Acrylic paint

  • Watercolor

  • Pastels

  • markers/colored pencils

  • paintbrushes

  • Drawing paper

  • Visual references of landscape paintings

  • All previous student artwork


______________________________________________________________
______________________________________________________________

Preparation and Safety: What do you need to prepare for this experience? What safety issues need to be addressed? List steps of preparation and safety in a bullet-ed format.
______________________________________________________________

  • Set up easels
  • Set up supply cart or table for various stages of painting
  • Arrive early to assure all materials are present and in place
  • Have rubber gloves at the ready
  • Monitor for proper use of tools
  • Review lesson plan
______________________________________________________________
______________________________________________________________

Accommodations: How is the lesson tailored (personalized) to the different needs, interests, and abilities of learners? ...Access (Resources and/or Process) and Expression (Products and/or Performance)?
______________________________________________________________

1. Elli needs to be able to sit in a chair instead of a stool if she needs. She will have a table set up next to the art tables.
2. Shelby will be monitored for continued interest. She has a short attention span.
3. All non verbal communicators will be shown the techniques through hand-over-hand demonstration.
4. Employ certain participants to assist in demonstrations, through their own activity.
______________________________________________________________
______________________________________________________________
             __________________________________________


0 Comments

Day Three 3/21/2016: Malleable Monday

5/11/2016

0 Comments

 
In today's lesson we worked with clay. We set up three different clay activities for students to explore. We made pinch pots, animals from pictures and faces. To learn more about the experience please go here.
Picture

Service Learning Lesson Plan 3
Title: Malleable Monday
Group/Date: 03/21/2016
Community Connections Kellyn, Erica and Crystal


____________________________________________________________
Lesson Idea and Relevance: What are you going to teach and why is this lesson of importance to your students? How is it relevant to students of this age and background?
_____________________________________________________________


  • Clay can be malleable, messy, and manipulated using certain techniques. Students can use these techniques to create forms relating to their interests.

______________________________________________________________
______________________________________________________________
Essential Understanding (s): What are the “big ideas”? What specific understandings about them are desired?
______________________________________________________________
  • Artists may utilize different materials for the creative process. The creative process involves finding the proper artistic media for the artist’s concept.


_______________________________________________________
_______________________________________________________

Essential Question (s): What provocative questions will foster inquiry, understanding, and transfer of learning?
_______________________________________________________
  • What sorts of forms, if any, have you seen or used that were made of clay? (sculpture, tableware)
  • What sorts of forms would you like to be able to create using clay? Why?

______________________________________________________________
______________________________________________________________
Outcomes - Students will be able to...What key knowledge and skills will students acquire as a result of this unit? ...Art history and culture; expressive features and characteristics of art; art materials, tools, and techniques? What should they eventually be able to do as a result of such knowledge and skill?  ...Compare and contrast art work; analyze sketches?
Students will be able to:
_______________________________________________________


  1. Students will be able to create a clay form such as a sculpture or bowl.
  2. Students will be able to use appropriate tools for manipulating clay.
  3. Students will be able to demonstrate their understanding of the creative process through sharing in a pair or through a gallery walk with their peers.

  4. Students will be able to infer the work of other artists by viewing a pottery display and by observing their peers’ work.

  5. Students will be able to transfer their knowledge of form in function in the previous lesson to working with new 3D materials.
  6. Students will recognize the relationship of form and function in their own community.


______________________________________________________________
______________________________________________________________

Student Reflective Activity: Through what authentic performance task(s) will students demonstrate the desired understandings? How will students reflect upon and self-assess their learning?
______________________________________________________________


  1. Students will reflect upon their work and the work of their peers through a gallery walk.
  2. Students will have opportunities to consider their process throughout the class period. Teachers will prompt thought through questions, or comments like “I see that when you pinch the clay, ______ happens!” Or ask verbally responsive students questions like, “What is happening to the shape as you pinch it?”

______________________________________________________________
______________________________________________________________

Assessment Instrument (s): By what criteria will “performances of understanding” be judged?
______________________________________________________________
  • Individual students will demonstrate their ability to use tools to create their desired effect.
GOOD: Student creates at least one work from each of the three stations using tools.
GETTING IT: Student creates at least one work from one or more of the stations using tools.
NOT GETTING IT: Utilizes clay, but not tools and does not complete any of the stations.


______________________________________________________________
______________________________________________________________

Pre-assessment: How will you help the students know where the unit is going and what is expected? Help the teacher know where the students are coming from (prior knowledge, interests)?
______________________________________________________________
  • Teachers will revisit the previous lesson concerning 3d work and briefly talk about form and function.
  • Teachers will ask students, “raise your hand if you have worked with clay before?” Teachers will demonstrate form and function through examples of finished work and a small pinch vessel.

______________________________________________________________
______________________________________________________________
Motivation: How will you hook all students and hold their interest?
______________________________________________________________
  • Teachers will bring students to the pottery display so they can view other artists’ work with clay, they can infer that work, and they can gain insight into creating form and function with clay.
  • Teachers will ask students questions like, “Do you see certain shapes in these forms?” Or “How do you think they did that?” Or comment things like “Look at how the shape affects how it works!”

______________________________________________________________
______________________________________________________________

Ideation: How will you equip students, help them experience the key ideas, and explore the issues to generate ideas for their art work?
______________________________________________________________
  • Allow students to experiment with clay as they brainstorm possible subject matter.
  • Allow students to view other objects that were made with clay.
  • Review previous student artwork.
  • Demonstrate clay manipulation techniques.
  • Demonstrate pinch pot­-making techniques.
  • Bring photos/examples of clay sculptures and pots for inspiration
  • Have physical examples of recently made work or previous student's work available for viewing.

______________________________________________________________
______________________________________________________________
Procedures: How is the lesson organized to maximize initial and sustained engagement as well as effective learning? Provide opportunities to rethink and revise their understandings and work? Allow students to evaluate their work and its implications? Include literacy and numeracy?
______________________________________________________________
  1. Welcome students back to class. Offer name tags if they wish to create them.
  2. Briefly review what we did last class and compare to today’s lesson (3D forms with found objects vs. 3D forms with clay.)

  3. Takes students to pottery display.
    1. Split students into three groups for better management.
    2. Walk students to the pottery department display cases.
    3. “ We are going to take a quick walk to view some examples of what some artists have done with clay.”
    4. Walk students around the three cases and discuss the different forms found within.
    5. "What technique do you think this artist used?"
    6. "Is this form functional or non-functional, what could you use it for?"
  4. Introduce materials and lesson.
    1. Show students clay materials and tools, give brief explanation while demonstrating what each tool does. Focus on more widely utilized tools.
    2. The lesson introduction:
      1. “Today we are going to investigate clay and what we can do with it.”
      2. “Picture in your mind some things that you have seen that may be made of clay.” 
      3. “ We have brought a few examples for you to view.” 
  5. Students will reflect periodically upon their pieces through teacher interactions.
    1. "I notice how you used your ______ to make..."
    2. "I see how you decided to use that technique to.."
  6. At the end of lesson, students will clean up their area, tools and move rendered clay to the clay firing box. Teachers will explain that each of their pieces will be "fired/cooked" so that they will be able to take their work home.
  7. Works will be arranged for viewing in the firing box(es).
  8. Students will conclude the lesson with a gallery walk and those who are able may discuss their work with others.
  9. After gallery share, students are asked to take previous works with them and then dismissed.


______________________________________________________________
______________________________________________________________

Materials and Resources: What is needed to complete the learning plan? List materials and resources in a bullet-ed format.
______________________________________________________________


★ artwork from Lesson 2, and remainders from lesson 1.
★ Clay
★ visual examples from artists/resource photo
★ Physical examples
★ Name tags
★ markers and colored pencils
★ Tissue Paper
★ Watered down glue
★ paintbrushes
★ Drawing paper
★ Clay tools and texture samples


______________________________________________________________
______________________________________________________________

Preparation and Safety: What do you need to prepare for this experience? What safety issues need to be addressed? List steps of preparation and safety in a bullet-ed format.
______________________________________________________________
  • Set up all materials
  • Set up separate ‘centers’ tables
    • blocks
    • frame pieces
    • reflection table- tissue paper, glue, markers and paper
    • found objects table
  • Monitor “found object” materials- no sharp objects, cigarette butts etc
  • Monitor tool use (especially the hot glue gun)
  • Monitor attendance at each table and encourage students to experience all of the tables.
______________________________________________________________
______________________________________________________________

Accommodations: How is the lesson tailored (personalized) to the different needs, interests, and abilities of learners? ...Access (Resources and/or Process) and Expression (Products and/or Performance)?
______________________________________________________________

1. Elli needs to be able to sit in a chair instead of a stool if she needs. She will have a table set up next to the art tables.
2. Shelby will be monitored for continued interest. She has a short attention span.
3. All non verbal communicators will be shown the techniques through hand-over-hand demonstration.
4. Employ certain participants to assist in demonstrations, through their own activity.
______________________________________________________________
______________________________________________________________
             __________________________________________


0 Comments

Day Two 2/29/2016: Gooey Thinking

5/11/2016

0 Comments

 
In this lesson, we wanted to incorporate the concepts of form and function. The students were taken on a nature walk at the beginning of class to discover art materials for their found object sculpture. We discussed the differences between functional and non-functional objects as well as art objects that have permanence versus those that do not. The link to the blog for this day is here.

Picture
Service Learning Lesson Plan 2
Title:   Gooey Thinking                                                                      Group/Date: 02/29/16
Community Connections Kellyn, Erica and Crystal
____________________________________________________________

Lesson Idea and Relevance: What are you going to teach and why is this lesson of importance to your students? How is it relevant to students of this age and background?
_____________________________________________________________


We will inform the students of and offer them several methods to create a form.

  • using three dimensional objects, the creative process can be used to affect a space.
  • It is important for students to be able to explore with three dimensional materials
We will introduce the idea of the relationship between form and function.

  • It is important for the students to learn that certain forms are more permanent and others are more temporary.

  • It is important for students to understand that form affects function and vice versa.
______________________________________________________________
______________________________________________________________
Essential Understanding (s): What are the “big ideas”? What specific understandings about them are desired?
______________________________________________________________
  • Art can be both temporary and long-lasting
_______________________________________________________
_______________________________________________________

Essential Question (s): What provocative questions will foster inquiry, understanding, and transfer of learning?
_______________________________________________________
  • How can artists change forms to affect their function?
  • How can artists use objects to alter a space?
  • When does a material become an art material?
______________________________________________________________
______________________________________________________________
Outcomes - Students will be able to...What key knowledge and skills will students acquire as a result of this unit? ...Art history and culture; expressive features and characteristics of art; art materials, tools, and techniques? What should they eventually be able to do as a result of such knowledge and skill?  ...Compare and contrast art work; analyze sketches?

Students will be able to:
_______________________________________________________

Students will be able to demonstrate their creative process of doing, intending, realizing, action, re-intending by creating various forms from explored 3D objects.

  1. Students will be able to demonstrate the relationship between permanent and impermanent forms.
  2. Students will recognize that changing a material can change an object’s function
  3. Students will be able to apply what they have learned from other artists to explore 3D forms.
  4. Students will be able to re-visit and build upon  understanding of previous tissue paper lesson.
  5. Students will be able to compare their work to their peers and infer the artwork of others.
Students will be able to explore and experiment with found and given objects to create 3D forms.
______________________________________________________________
______________________________________________________________

Student Reflective Activity: Through what authentic performance task(s) will students demonstrate the desired understandings? How will students reflect upon and self-assess their learning?
______________________________________________________________

Artist Gallery Walk: Students will be given the opportunity to reflect and analyze their own work through viewing their peers’ work. Students will be able to reflect upon their own work as well as infer the art making process by looking at others’ work. This will serve as a conclusion to the session as well as a transition into clean-up.

Review: Students will be given a chance to reflect and comment on their finished/dry artwork from Lesson 1.
______________________________________________________________
______________________________________________________________

Assessment Instrument (s): By what criteria will “performances of understanding” be judged?
______________________________________________________________
  • Students will demonstrate understanding by creating a form with a function or without function.
  • Students will show others their work and demonstrate its function/s or lack of function.
Rubric:

Good: Student will create at least one permanent and one temporary sculpture and understand the difference.
Getting it: Student will create at least one sculpture either temporary or permanent and have explored the materials.
Not Getting it: Student demonstrates difficulty with materials, understanding of temporary or permanent, student does not participate in activity.
______________________________________________________________
______________________________________________________________

Pre-assessment: How will you help the students know where the unit is going and what is expected? Help the teacher know where the students are coming from (prior knowledge, interests)?
______________________________________________________________
  1. Interest in 3d work has been exhibited in previous introduction activity by most students.
  2. Teachers will ask students questions to assess and access the students’ prior knowledge like:

  • “Last time we worked with tissue paper, which is a 2D form. Raise your hand if you think there a difference between 2D forms and 3D forms?”
  • “Raise your hand if you can tell me what a 3D form is?”
  • “What kind of forms can we use? What kind of forms do we not use?”
  • “Are there certain 3D forms that I can keep versus forms that I cannot keep?”
______________________________________________________________
______________________________________________________________
Motivation: How will you hook all students and hold their interest?
______________________________________________________________
  • Invite the students to go outside for a nature walk to collect possible sculpture materials.
  • Ask inspirational questions in a role-playing fashion.
-“Kellyn, what does this rock look like to you?” -“Do you ever see objects on the ground that you wish you could pick up?”
-“Hey, wouldn’t this be cool if I stacked these sticks to create a sculpture?”


During lesson questions:

  • “ How is building with these blocks different than this sculpture that we used glue on?”
  • ” What if I layered these leaves or blades of grass on a piece of paper?”  I wonder what would happen if I glued them down?”
______________________________________________________________
______________________________________________________________

Ideation: How will you equip students, help them experience the key ideas, and explore the issues to generate ideas for their art work?
______________________________________________________________
  • Introduce Idea through hook conversation and demonstration.
  • Ask brief question of function or no function for everyday objects.  Keep it obvious.
  • Demonstrate creating a form after the nature walk with collected objects. Teachers can ask students questions like “Could I stack these objects in an interesting way?” or “How could I attach these pieces so that I could change the form that I create?” or “Look how this leaf changes shape when I tear it, how could I use it to create color or texture on my sculpture?”
  • Students can consider ideas for their sculptures by discussing or demonstrating possibilities.
______________________________________________________________
______________________________________________________________
Procedures: How is the lesson organized to maximize initial and sustained engagement as well as effective learning? Provide opportunities to rethink and revise their understandings and work? Allow students to evaluate their work and its implications? Include literacy and numeracy?
______________________________________________________________
  1. Reintroduce ourselves and help students create a personalized name tag (choose color, add designs if desired)
  • Briefly review what we did last class and compare to today’s lesson

  • ex: “Last time we worked with 2 dimensional materials. This time we are going to work with 3 dimensional materials.”
   2. Hook question and lesson introduction. Inform paras that we will be going outside for the first part of our lesson. We will ask paras to have students in groups of two or three for better walk management.  

  • Ask hook question, full group. Demonstrate while talking to reinforce idea. Demonstrate a found object and question the identity of the object. ie: “Kellyn what does this thing look like to you?” As we go outside, teachers can ask students questions like “have you ever seen anything on the ground that’s interesting that you’ve wanted to pick up?” “Hey, wouldn’t this be cool if I stacked these sticks to create a sculpture?”

  • Teachers will have students collect materials that they find interesting such as (but not limited to) rocks, sticks, leaves, etc.

   3.  Teachers will explain to students that there will be three centers with different materials that they can interact with.

  • Introduce materials, at each table. ie: this table has blocks, this table has other found objects like you found, etc.

  • Explain that each student may experience each table, they do not have to stay at one table. They may work until they feel they are finished at that table. They will be reminded to share and take turns if necessary.

  • Motivational questions may be asked at each center to encourage students to utilize the materials.

    1. ex: “what could happen if you glued this object in the hole of the other one? What other materials could you bring in?

   4. Teachers will bring in objects to give students visual examples found from other artists who build sculptures out of found and/or common objects

  • example: Andy Goldsworthy

   5. Students will be encouraged to explore as many forms and shapes as possible.

  • If there are students who work faster than other students in all of the centers, they will be encouraged to re-visit tissue paper to document their forms or brainstorm other ideas for other things that could be used in sculpture.

   6. Teachers will conclude the lesson by giving students the opportunity to walk around the room and look at their peers’ work. Teachers will encourage students to gather ideas from their peers and think about or ask how they did what they did.

   7. After the gallery walk, teachers will say, “Now it’s time to clean up. Make sure that you clean up your materials and your working space. Remember, everyone needs to contribute to cleaning up.”
______________________________________________________________
______________________________________________________________

Materials and Resources: What is needed to complete the learning plan? List materials and resources in a bullet-ed format.
______________________________________________________________
  • artwork from Lesson 1
  • wood blocks
  • premade forms (sculptures?)
  • visual examples from artists/resource photos
  • plate, cup, bowl
  • lesson plan
  • Name tags
  • markers and colored pencils
  • glue/hot glue gun
  • Tissue Paper
  • Watered down glue
  • paintbrushes
  • Drawing paper
  • Miscellaneous pieces: deck of cards, picture frame pieces, plastic silverware, etc.
______________________________________________________________
______________________________________________________________

Preparation and Safety: What do you need to prepare for this experience? What safety issues need to be addressed? List steps of preparation and safety in a bullet-ed format.
______________________________________________________________
  • Set up all materials
  • Set up separate ‘centers’ tables
  1. blocks
  2. frame pieces
  3. reflection table- tissue paper, glue, markers and paper
  4. found objects table
  • Monitor “found object” materials- no sharp objects, cigarette butts etc
  • Monitor tool use (especially the hot glue gun)
  • Monitor attendance at each table and encourage students to experience all of the tables.
______________________________________________________________
______________________________________________________________

Accommodations: How is the lesson tailored (personalized) to the different needs, interests, and abilities of learners? ...Access (Resources and/or Process) and Expression (Products and/or Performance)?
______________________________________________________________

1. Elli needs to be able to sit in a chair instead of a stool if she needs. She will have a table set up next to the art tables.
2. Shelby will be monitored for continued interest. She has a short attention span.
3. All non verbal communicators will be shown the techniques through hand-over-hand demonstration.
4. Employ certain participants to assist in demonstrations, through their own activity.
______________________________________________________________
______________________________________________________________
             __________________________________________


0 Comments

Day One: We meet our students!

5/11/2016

1 Comment

 
For the first lesson we decided to incorporate a get-to-know-you activity. Our focus for this lesson was material exploration. Without knowing too much about our group we made the following plan. Although the first meeting went well we did not capture any photos of the first lesson.  Instead I have shared a photo of some finished work created during the lesson. Follow the link to the blog for Day 1 and there is more to learn!  http://spring16servicelearningcc.weebly.com/blog/previous/5
Picture
Service Learning Lesson Plan 1
Title:   Getting to know you                                                                     Group/Date: 02/08/16
Community Connections Kellyn, Erica and Crystal
____________________________________________________________

Lesson Idea and Relevance: What are you going to teach and why is this lesson of importance to your students? How is it relevant to students of this age and background?
_____________________________________________________________


  1. Students will engage in a get-to-know-you activity and talk with teachers about their choices. It is important for students and teachers to each other to understand expectations.
  2. Students will learn about material through exploration. Exploration is an important part of life and learning.


______________________________________________________________
______________________________________________________________
Essential Understanding (s): What are the “big ideas”? What specific understandings about them are desired?
______________________________________________________________
  • You can do many things with materials: known and explored


_______________________________________________________
_______________________________________________________

Essential Question (s): What provocative questions will foster inquiry, understanding, and transfer of learning?
_______________________________________________________
  • How do artists know what materials do?
  • How do artists choose their materials?

______________________________________________________________
______________________________________________________________
Outcomes - Students will be able to..
______________________________________________________________
  1. Students will explore the materials provided and techniques demonstrated, then apply that information to create art.  
  2. Students will compare and contrast their work with their peers work and recognize the materials and process used to create the work. 
  3. Students will be able to infer the art making process in the art work of others.


______________________________________________________________
______________________________________________________________

Student Reflective Activity: Through what authentic performance task(s) will students demonstrate the desired understandings? How will students reflect upon and self-assess their learning?
______________________________________________________________


Students will share and reflect on their creative discoveries with their peers and teachers through a group review/critique.


______________________________________________________________
______________________________________________________________

Assessment Instrument (s): By what criteria will “performances of understanding” be judged?
______________________________________________________________


Students will each be individually asked about their processes.
Student and teacher will discuss student's intent with their processes. Some questions that might be considered are:
  •   What did you do first, second ....?
  •   What did you discover when you.....?
  •   What did you like about the process?
  •   What would you do next using the same materials?
  •   What do you still wonder about (materials, ideas)?

Rubric:

Good:
Student demonstrates understanding of exploration by completing several works incorporating several or all of the demonstrated techniques.

Getting it:
Student demonstrates understanding of exploration by completing any works using any of the techniques demonstrated.

Not Getting it:
Student demonstrates difficulty with concepts by showing disengagement, confusion or lack of desire to complete at least one of the tasks.
______________________________________________________________
______________________________________________________________

Pre-assessment: How will you help the students know where the unit is going and what is expected? Help the teacher know where the students are coming from (prior knowledge, interests)?
______________________________________________________________
  1. Through the introduction activity the students will indicate what they already know about and what they would like to learn about by making different marks on the worksheet images.
  2. Students will be asked before demonstration: Has anyone used tissue paper to create art? How did you use it? Do you think there are other ways to use tissue paper in art? How?

______________________________________________________________
______________________________________________________________
Motivation: How will you hook all students and hold their interest?
______________________________________________________________

Exploration theme: I wonder....
Demonstration of techniques that encourages student interaction:
  • While demonstrating the painting technique with tissue paper have a conversation about what you are doing. "Oh look at what happened here, I put some glue mixture over the tissue paper and it made a mark beyond. I wonder what would happen if I took it off and put another color there?"


During lesson questions:

  • Students will be shown visual examples and inspiration for different possibilities of using tissue paper in the art­-making process.
  • Students will be encouraged observe their peers’ explorations and hear from their peers about their discoveries.
______________________________________________________________
______________________________________________________________

Ideation: How will you equip students, help them experience the key ideas, and explore the issues to generate ideas for their art work?
______________________________________________________________
  • Discuss different ways the material (tissue paper) can be used and then encourage students to explore with the material to find other ways that it can be used.
  • " Look what happens when I do..."


______________________________________________________________
______________________________________________________________
Procedures: How is the lesson organized to maximize initial and sustained engagement as well as effective learning? Provide opportunities to rethink and revise their understandings and work? Allow students to evaluate their work and its implications? Include literacy and numeracy?
______________________________________________________________

Personal Intro time:

  •  Teachers will introduce themselves (approximately 5 minutes)
  •  Students will be encouraged to introduce themselves through an introduction activity. Teachers will explain that the icons on their worksheet represent different art activities that we could do. Teachers would then ask the students to circle all of the activities that they are interested in doing for the next four lessons. Students complete first task, then teachers request that students then color the activities that they have already done. (approximately 15minutes)
Introduce lesson for the day:
  •        "Today will be working with colored tissue paper and glue, we would like to share with you a couple of techniques that you can explore." 
  •        "Before we get started let's see by raise of hands how many of you have worked with tissue paper before."
  •        "How many ways do you think that you can use tissue paper in art? Lead into demonstration.
Demonstrate  first two techniques:

  •         Printing: Lay tissue paper on white stock and brush with solution. Wait a couple of seconds (could be dramatically thinking) then "No, I really do not like that there." pull up tissue paper, " Oh! look what happened." This is one way that you can use your tissue paper, you can print the color onto your paper, then stick the tissue paper somewhere else on your work.
  •         Painting: This is similar to the previous technique in that the color bleeds off of the tissue paper and "stains" the work paper.
  •  Allow students to explore this technique for several minutes. (approximately 10-15 minutes) Observe for quick learners and lack of engagement.
Demonstrate second two techniques:
  •         Overlapping colors: With this technique you overlap tissue colors to create new colors, the more solution you use the more transparent the tissue becomes. This could create a mosaic of colors and shapes.
  •         “bleeding” colors: this technique combines the previous three demos. The colors of the tissue paper are moved and blended over the work paper.
Discuss:

  • ​Ask students how they think artists choose their materials and how artists know what materials to use by bringing in visual examples and inspiration. Give students time to reflect on how their explorations are going and generate ideas for further direction as artists using this particular material for their art-­making process. "What have you discovered so far?"
Demonstrate last set of techniques:


  •   Resists: using oil pastels, or glue; demonstrate how resists work   with tissue paper painting.
  •  Seek, find and draw: In this demonstration one of the first demo sheets can be used (if it is dry) to show the students how to "find" pictures and shapes in their creations and draw them in.
Group Critic and Gallery experience:

  • The students will be asked to put away their materials and leave their work out for others to view. Students will be encouraged to walk around to look at their peers work.
  • Teachers will review essential questions through conversation with students about their finished works.
Class dismissed after final clean up.

______________________________________________________________
______________________________________________________________

Materials and Resources: What is needed to complete the learning plan? List materials and resources in a bullet-ed format.
______________________________________________________________
  • Paper
  • Multiple colors of tissue paper diluted glue
  • cups
  • brushes
  • roll mats
  • markers, crayons and pastels
  • paper plates
  • paper towels
  • gloves
  • copies of introduction activity sheets
  • Name tages
  • Lesson plan

______________________________________________________________
______________________________________________________________

Preparation and Safety: What do you need to prepare for this experience? What safety issues need to be addressed? List steps of preparation and safety in a bullet-ed format.
______________________________________________________________

1. Materials will be prepared for students before they arrive.
2. Offer gloves to students when using the processes.


______________________________________________________________
______________________________________________________________

Accommodations: How is the lesson tailored (personalized) to the different needs, interests, and abilities of learners? ...Access (Resources and/or Process) and Expression (Products and/or Performance)?
______________________________________________________________

TBD
______________________________________________________________
______________________________________________________________
             __________________________________________


1 Comment

    Author

    Crystal Hinds
    This blog is outlining my experience with Community Connections of Fort Collins in a service learning experience.

    Archives

    May 2016

    Categories

    All

    RSS Feed

Powered by Create your own unique website with customizable templates.